Introduction
California homes experience a wide range of attic conditions, from the scorching inland valleys to the cool, humid coast. A thoughtfully installed attic fan can relieve heat buildup, protect roofing materials, and support healthier indoor comfort. This guide outlines the essential steps for planning and executing an attic fan project in California, focusing on safety, ventilation balance, and roof integrity. Whether you intend to do parts of the work yourself or hire a professional for attic fan installation, the sequence below will help you organize the project, avoid common mistakes, and get the result you expect.
Because every home is unique, think of these steps as a framework rather than a rigid script. Adjust the details to match your roof material, attic layout, and local permitting requirements, and always prioritize weatherproofing and intake ventilation as cornerstones of performance.
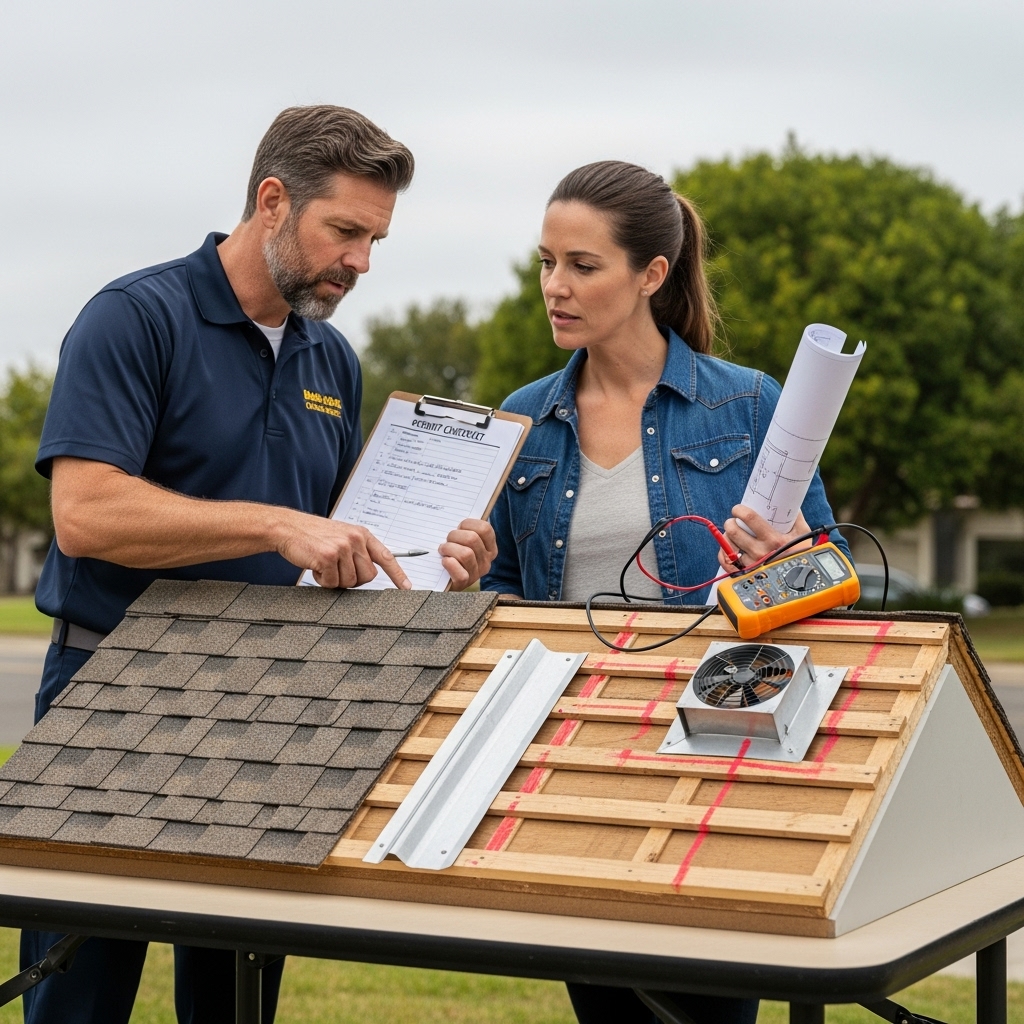
Step 1: Assess Attic and Roof Conditions
Begin with a thorough attic inspection. Note the height and accessibility of the space, truss layout, and any obstructions like ductwork, plumbing vents, or structural beams. Look for signs of moisture—staining on sheathing, rusted nails, or musty odors—that indicate inadequate ventilation. Confirm the condition of existing insulation and whether it blocks soffit intakes. On the roof, document pitch, roofing material, and potential obstacles or shading that could affect placement, especially if you are considering a solar-powered unit.
Step 2: Define Goals and Select Fan Type
Identify your primary goals—heat relief, humidity control, or both. Then choose a fan style that aligns with those goals and your roof conditions. Roof-mounted fans are common and effective near the ridge. Gable-mounted fans can be attractive when existing gable vents are well-positioned and structurally sound. Decide between hardwired and solar units based on electrical access, sun exposure, and your preferences for controls, such as thermostats or humidistats.
Step 3: Verify Intake Ventilation
An attic fan cannot do its job without sufficient intake at the eaves. Calculate or estimate the required intake area for the fan capacity you plan to use, then check that soffit vents are clear and continuous. Install baffles to hold insulation back from the roof deck and maintain airflow channels. If intake is limited, plan to add vents or reduce fan capacity accordingly to avoid negative pressure that can pull conditioned air from the living space.
Step 4: Air Sealing Above the Ceiling Plane
Before installing the fan, seal penetrations in the attic floor—including around recessed lights, electrical boxes, plumbing chases, and attic hatches—to prevent the fan from drawing air from the home. Air sealing supports comfort, preserves HVAC efficiency, and helps the fan remove attic air specifically, which is the goal.
Step 5: Select the Location
Choose a placement that provides a direct path from soffit intake to exhaust without short-circuiting. Near the ridge is ideal for roof-mounted fans, but maintain required clearances from ridges, hips, and other penetrations. For gable fans, verify that the gable vent opening is appropriately sized and structurally supported. Mark the location from inside the attic and drill a pilot hole to align with the roof surface.
Step 6: Plan for Permits and Inspections
Many California jurisdictions require permits for electrical work and roof penetrations. Plan for inspections where required. Compliance not only protects you but also ensures the installation meets local safety and weatherproofing standards. If you are hiring a contractor, clarify who will manage the permit process.
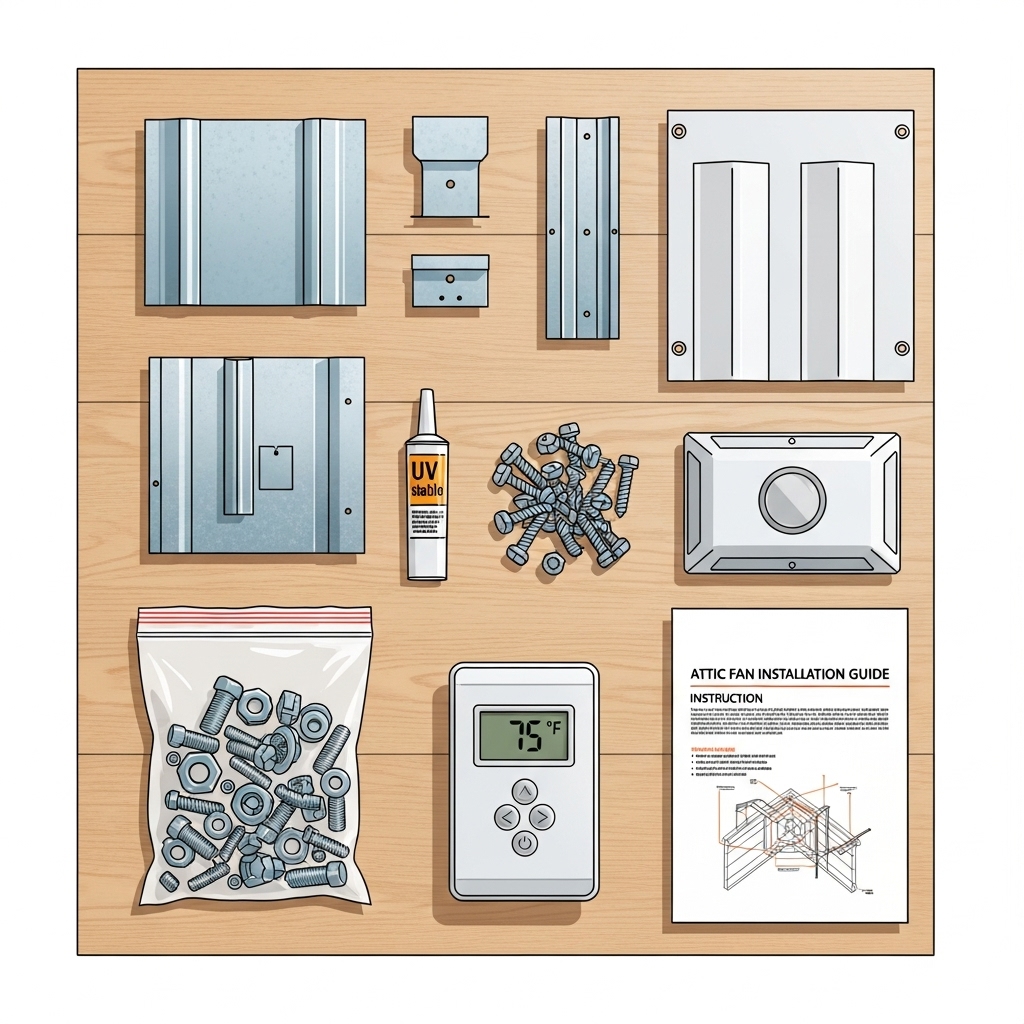
Step 7: Prepare Tools and Safety Gear
Roof work demands careful planning. Assemble fall protection, stable ladders, and roof brackets if needed. Gather cutting tools for decking and roofing, a drill/driver, compatible fasteners, flashing, sealants, and underlayment patches. In the attic, maintain safe walkways and adequate lighting. Delay work in wet or windy conditions to protect both workers and materials.
Step 8: Cut the Opening and Install Flashing
Remove roofing materials at the marked location per your roof type. Cut the roof deck opening according to the fan template, keeping edges clean. Install flashing so that upper portions tuck under the higher course of roofing, using shingle-style overlaps that shed water. Integrate the flashing with underlayment and use sealant sparingly and appropriately as a supplement to mechanical layering.
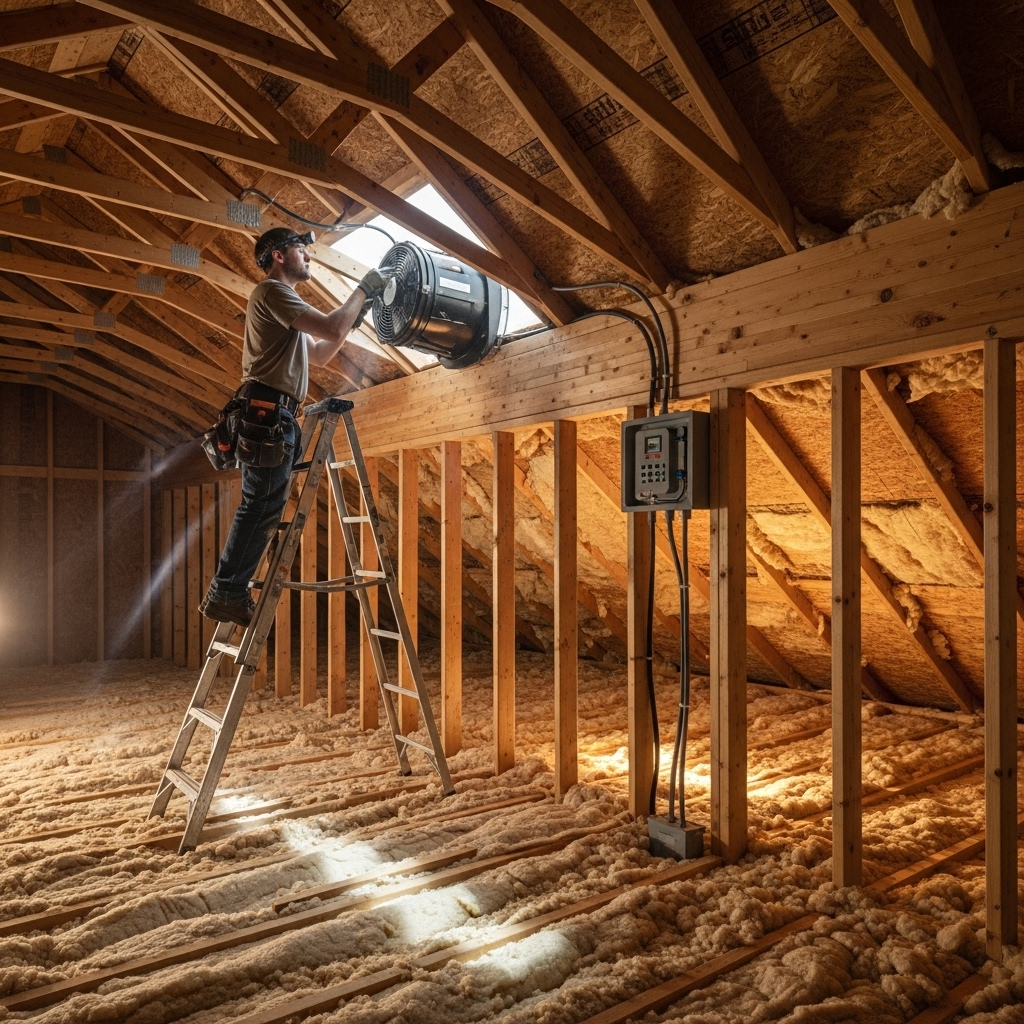
Step 9: Mount the Fan Assembly
Place the fan housing over the opening, seat it flat, and fasten it per manufacturer specifications. For tile or metal roofs, use flashings designed for those materials and account for expansion, drainage paths, and tile replacement. Reinstall roofing around the flashing, ensuring no gaps or misaligned shingles or tiles remain.
Step 10: Electrical or Solar Integration
For hardwired fans, route wiring in compliance with local code, using appropriate protection, junctions, and labeling. Install controls—thermostats, humidistats, or speed controls—in accessible locations. For solar units, orient the panel to maximize sun exposure and secure wiring with UV-resistant clips. Protect penetrations with grommets and compatible sealants.
Step 11: Commissioning and Performance Checks
Test the fan under expected conditions. Confirm airflow at the exhaust and detect intake draw at the soffits. Listen for unusual sounds that could indicate vibration or debris contact. Verify that controls trigger the fan at appropriate thresholds. Inside the attic, inspect for daylight around the housing to identify gaps, and verify that other exhaust vents discharge outdoors and not into the attic.
Step 12: Documentation and Maintenance Plan
Record the installation date, product information, and photos of flashing and wiring. Create a seasonal checklist: inspect fasteners and sealants, clear debris around the fan, verify intake vents remain open, and test controls. This upfront organization helps preserve performance for years.
Pro Tips for California Homes
- Microclimate Matters: Inland regions tend to need higher airflow; coastal areas benefit from corrosion-resistant materials and moisture-aware controls.
- Wildfire Considerations: Ember-resistant screening and careful vent placement may be required in designated areas.
- Tile Roof Nuances: Use purpose-built flashings and plan for tile adjustments to maintain drainage patterns.
- Insulation Density: Dense or high-R insulation demands baffles to keep soffit channels open.
- Avoid Short-Circuiting: Keep the fan away from ridge vents or close them as recommended to avoid pulling air from the nearest opening.
When to Bring in a Professional
Roof penetrations, tile work, and electrical planning challenge even experienced DIYers. A professional brings repeatable weatherproofing techniques, ventilation math, and safety practices to the job. If you want a smooth experience and a warranty-backed result, talk with a provider that specializes in attic fan installation who can verify intake balance, integrate controls, and coordinate inspections.
Frequently Asked Questions
How do I know my fan is properly sized? Consider attic volume, roof complexity, and available intake area. Multiple smaller fans are sometimes better than a single large unit, depending on the attic’s shape and partitioning.
Will the fan make my AC work less? By reducing attic temperatures, the fan can lower heat transfer into living spaces, allowing your AC to cycle less frequently. Actual impact varies with insulation, air sealing, and climate.
What if I already have ridge vents? Some systems benefit from closing ridge vents near the fan to prevent short-circuiting. A ventilation assessment will determine the best combination for your roof.
Is a permit required? Many jurisdictions require permits, especially when electrical work or new roof penetrations are involved. Check locally before you begin.
How loud are attic fans? Quality units with balanced blades and isolation mounts are typically quiet. Noise is also influenced by attic structure and speed settings.
Do solar fans work on cloudy days? They often operate at reduced speed under bright overcast conditions. For consistent operation regardless of weather, a hardwired model may be preferred.
How often should I maintain the system? Schedule seasonal checks to verify fasteners, sealants, and intake vents, and to test controls. After major storms, inspect the roof area surrounding the fan.
Make Your Next Step Count
If you are ready to improve comfort and protect your roof, consider scheduling a site visit to evaluate attic volume, intake balance, and roof details. An experienced team can streamline the process, from flashing to commissioning, so you get predictable results. For tailored recommendations and a smooth, code-compliant experience, reach out to experts in attic fan installation and move forward with confidence.